I got tired of guessing every time I watered my Anthuriums. There was a stage when almost every watering day felt the same: I would stand in front of the pot and hesitate. Was the mix dry enough this time? Was it still holding more moisture than I thought? Had I already watered too much the last time and just not realized it yet?
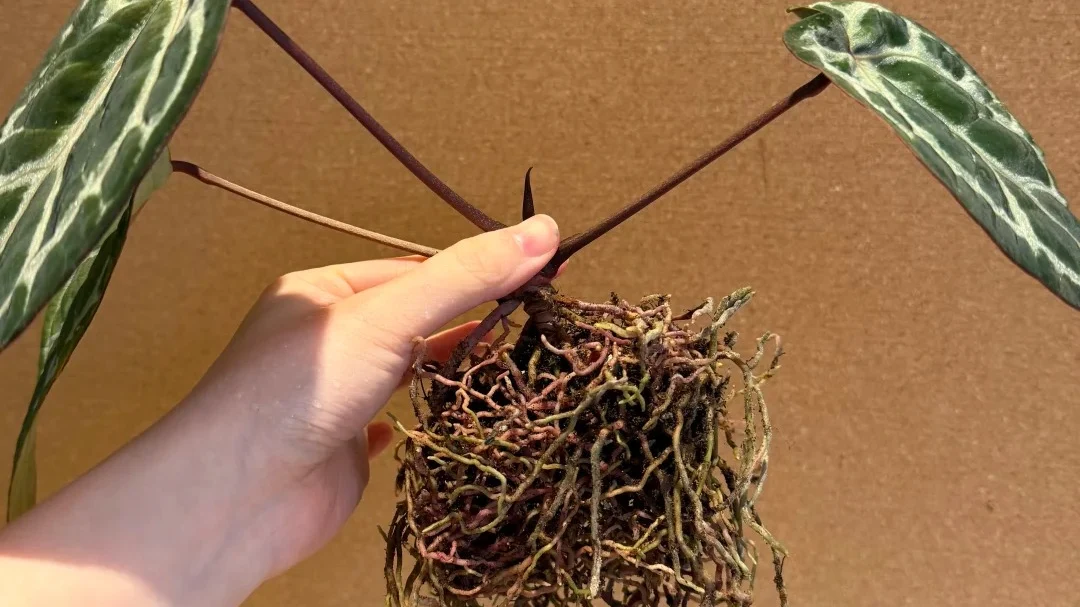
That uncertainty got a lot worse after I lost a batch of Anthuriums following a short trip away from home. I had been gone for a few days, came back feeling guilty that they had gone too dry, and gave them a heavy watering to make up for it. At first they actually looked fine. Then two days later, the petioles softened, the plants started collapsing, and when I finally pulled them out, the roots were black. It was one of those mistakes that feels obvious only after you have already made it.
That was the point where I stopped wanting a vague answer like “water when dry.” I did not want to keep watering by instinct, second-guessing every pot, and then trying to fix problems after the fact. I wanted to see what would actually happen if I compared different watering setups under the same conditions.
The 4 Watering Setups I Wanted to Compare Side by Side
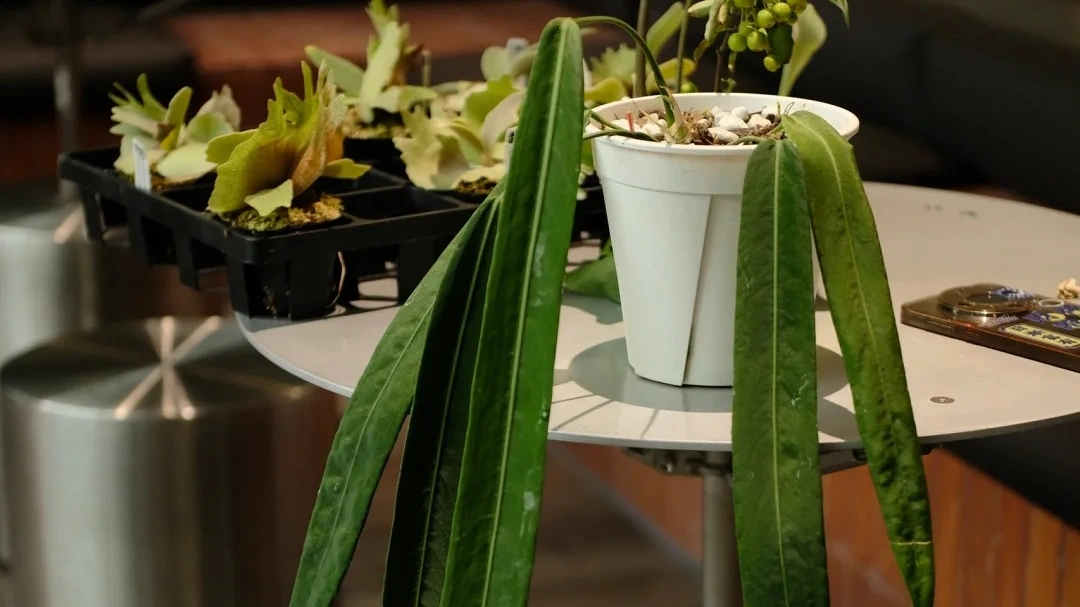
Once I decided I wanted something more useful than guesswork, I set up a small side-by-side watering test at home. I used seedlings of the same type, kept them at a similar size, grew them in the same self-mixed PON-style substrate, and kept them in the same general environment. The idea was not to create a perfect lab experiment, but to remove enough variables that the watering style itself could become easier to read.

I got tired of guessing every time I watered my Anthuriums. There was a stage when almost every watering day felt the same: I would stand in front of the pot and hesitate. Was the mix dry enough this time? Was it still holding more moisture than I thought? Had I already watered too much the last time and just not realized it yet?
Method A: Standard Top Watering

This was the most familiar setup: water from the top once the mix feels dry enough, with no standing water left underneath and excess water allowed to drain away naturally. For the sake of consistency, I used an automatic pump to deliver 33 ml per day as the standardized version of this method.
The advantage of this setup is flexibility. It is simple, easy to understand, and close to how many people already water at home. But it also depends heavily on how well you judge dryness, and that is exactly where newer growers often get into trouble. If your sense of “dry enough” is off, it is very easy to swing between underwatering and keeping the pot a bit too wet without realizing it.
Method B: Water Sitting in an Outer Pot

In this setup, the inner pot sat inside an outer pot that held water, so the base of the growing container stayed in ongoing contact with a moisture source. I still added the same daily 33 ml, but the difference was that the bottom of the system could remain wet for much longer.
This kind of setup is very tempting because it feels convenient and forgiving. It looks like an easy way to keep moisture stable without thinking too hard. But that same stability can become a problem if the lower root zone never really gets a chance to breathe. For Anthuriums, that constant wet contact at the bottom can quietly turn into oxygen stress and root discomfort long before the plant looks obviously bad above the soil line.
Method C: Wick Watering

This was the wick setup. Instead of watering from above in the usual way, I placed water in the outer container and used a wick to pull moisture upward into the mix through capillary action. The goal was to create a more even, low-fluctuation moisture supply rather than obvious wet-dry cycles.
The appeal here is obvious: it looks stable, controlled, and gentle. In theory, the plant draws what it needs and the moisture level stays more even. But one of the things I wanted to test was whether “more stable” would actually feel healthier to the roots over time. A wick system can reduce big moisture swings, but that does not automatically mean it is safer. If the lower zone stays consistently too damp, or if the wick and water reservoir start creating stale conditions, the problem just becomes quieter rather than more visible.
Method D: Timed, Measured Watering

This setup was the most controlled. I used fixed watering times, fixed volumes, and a full soak-and-drain rhythm rather than passive moisture storage. In other words, the plant was watered thoroughly on schedule and then allowed to drain fully, with the whole process repeated in a measured way.
The biggest advantage here is repeatability. This kind of method removes a lot of human hesitation and makes the rhythm easier to track. It is especially appealing if you like systems, routines, and data. The downside is that it takes more setup, more equipment, and more intention to build properly. It is not the most casual method, but it gives you a much clearer sense of what kind of moisture cycle you are actually creating.
What made this comparison useful for me was realizing that these were not just four ways of “giving water.” They were really four different ways of controlling root-zone moisture over time. And with Anthuriums, that rhythm matters much more than I used to think.
By Week 2, the Differences Were Already Showing
I did not need to wait until the end of the trial to see that the four setups were already moving in different directions. On the surface, they all still looked fairly fine for a while. No dramatic collapse, no obvious yellowing, no instant disaster. But once I started paying attention to moisture patterns, odor, and bud activity instead of just whether the seedlings were still alive, the differences became much easier to see.
| Method | Surface Moisture | Odor | Bud Activity | Overall Direction |
|---|---|---|---|---|
| A. Standard Top Watering | Slightly moist | None | Mild by Week 3 | Stable but not explosive |
| B. Water Sitting in an Outer Pot | Evenly moist for too long | Slight stagnant smell | Weak | Highest root-zone risk |
| C. Wick Watering | Low fluctuation | Later developed odor | Slow at first, then moved | Stable-looking, but not clean underneath |
| D. Timed, Measured Watering | Controlled wet-dry rhythm | Very light or none | Strongest | Most active and promising |
Week 2: Everyone Was Alive, but the Differences Had Already Started
By the second week, all four groups were still alive and outwardly fairly stable. If I had judged them from a quick glance alone, I might have said the methods were all working. But once I started paying attention to surface moisture, odor, and bud activity, the setups were already beginning to separate.


Group A still felt reasonably balanced and open. Group B was the first one that made me uneasy, because the surface stayed evenly moist and the outer pot had already started developing a slight stagnant smell. Group C looked stable at first, but later in the same week the outer water began to smell too, which made me question whether smooth moisture delivery was really creating a healthy root environment. Group D was the one that already seemed a little more active, with cleaner moisture behavior and buds that looked slightly more willing to move.

Week 3: The “Stable” Setups Were Not the Same Kind of Stable
By the third week, the difference between “still alive” and “actually moving forward” had become much clearer. Group D had pulled ahead most visibly, with stronger bud movement and higher water use. Group A still looked respectable and low-risk, but more steady than vigorous. Group C had finally started moving too, yet by then I no longer trusted its apparent stability completely because the smell issue had already suggested the lower root zone was not as clean as it looked from above. Group B remained the most worrying setup, with the strongest signs that the roots were spending too much time in a low-oxygen environment.


That was probably the most useful lesson from this stage of the test: stable water supply and a healthy root zone are not the same thing. Some methods made the plant look evenly supported from above, while the root environment underneath was quietly drifting in the wrong direction.


The Biggest Thing This Experiment Taught Me: Anthuriums Care About Rhythm More Than “More” or “Less”
The biggest lesson from this trial was that Anthuriums are not simply afraid of dryness or automatically happier the wetter they stay. What mattered much more was the rhythm the roots were living in.
A root zone can stay evenly moist and still become a problem if it stays stale, airless, or wet for too long. On the other hand, a plant does not automatically suffer just because the mix moves through clearer wet-dry phases, as long as those shifts stay within a range the roots can actually tolerate. Watching the four setups side by side made that much easier to see. “Always moist” did not automatically mean safer, and the methods that looked easiest were not always the ones creating the healthiest conditions underneath.
With Anthuriums, watering is less about giving more or less water, and more about creating a root zone that does not stay stale, airless, or wet for too long.
What I Actually Pay Attention to When Watering Changes
At this point, I no longer treat how often to water Anthuriums indoors as a fixed number that works all year. What I pay attention to instead is what has changed around the plant and what that change means for how fast the roots can actually use water. In real home conditions, watering frequency shifts all the time because the plant’s ability to take up water keeps shifting too.
Temperature Changes Everything Faster Than Most People Realize
Temperature is one of the first things I think about. Around the mid-20s°C, Anthuriums usually feel much more active. The roots take up water more confidently, the leaves transpire more steadily, and the whole plant tends to move forward more easily. But once temperatures drop, root activity slows down much faster than many people expect.
That is why I never trust the same watering rhythm in winter that worked in summer. A pot that dries comfortably in warm conditions can stay damp far too long once the room cools down. If the temperature drops, I start assuming the roots will use water more slowly, even before the plant shows me anything obvious above the soil.
The Mix Decides Whether “Moist” Feels Healthy or Dangerous
The same amount of water can feel completely different depending on the structure of the mix. A chunkier substrate with larger particles gives the roots more air and drains more freely, so “moist” can still feel breathable. A finer, denser mix holds onto water differently, and that same moisture level can start feeling heavy much faster.
This is why I do not think about watering apart from the right soil structure for Anthuriums. Particle size, particle ratio, and the balance between moisture retention and airflow change everything. With Anthuriums, the question is never just “Did I water?” It is also “What kind of root zone did that watering create?”
Airflow Matters Both Above and Below the Soil
Airflow is not just about the leaves. It matters in the root zone too. If the substrate is too closed, too compacted, or too saturated for too long, the roots lose the kind of oxygen-rich environment they need to stay active. That is often where root trouble really begins.
Above the soil, steady, gentle airflow also helps the leaves transpire more normally, which changes how the plant moves water overall. I have found that Anthuriums usually respond better to a consistent, breathable setup than to one that stays humid but stagnant. Small, steady airflow often does more good than high humidity on its own.
Light Changes How Fast the Plant Can Actually Use Water
Light affects watering much more than many people realize. Stronger light increases transpiration, which usually means the plant can move and use water more actively. In lower light, that same pot may stay wet far longer because the plant simply is not pulling through water at the same pace.
For indoor Anthuriums, I usually think in a range of roughly 5,000 to 10,000 lux, depending on the plant and setup. Once light drops below what the plant can really use well, I become much more cautious about watering the same way I would during a brighter, more active period. Using a summer watering rhythm in weak light is one of the easiest ways to end up with a pot that stays wet too long.
Bigger Plants and Active Flowering Need a Different Watering Rhythm
A larger Anthurium naturally uses water differently from a small seedling. More leaves mean more surface area, more transpiration, and more overall demand. That sounds obvious, but it matters because people often keep watering the pot according to habit instead of according to how much plant is actually sitting in it.
The same goes for mature plants that are flowering or setting fruit. At that stage, the plant is not only maintaining more leaf mass, but also putting energy and water into reproduction. That does not mean I water carelessly, but it does mean I expect the rhythm to shift. A plant that is actively growing, flowering, or carrying fruit rarely behaves like one that is just quietly sitting there.
Fertilizer, Root Health, and Long Dry Spells All Change Water Uptake
Not every watering problem starts with water alone. Fertilizer concentration can change how easily the roots take up moisture. If the solution is too strong, the roots may struggle and the plant can start acting like it is thirsty even when there is water in the pot. In practice, what people describe as “burning the roots” often shows up as a water-uptake problem first.
Root health also matters more than people think. If a plant has gone through a long dry spell and the roots have visibly shrunk, dried, or gone inactive, I do not expect it to handle water the same way it did before. A plant like that may need a gentler return to moisture rather than a sudden heavy soak.
Even the biological life in the pot can change the rhythm. Once a substrate has an active microbial population, especially after using biological products or microbe-rich amendments, the dry-down pattern can change noticeably. That is another reason I no longer believe in fixed watering intervals. The plant’s ability to use water is always moving with the conditions around it.
What I Look At Before I Reach for Water
At this point, I do not water an Anthurium just because the surface looks dry. That is usually where my judgment used to go wrong. What I try to read now is the pot as a whole — how heavy it still feels, how the root zone is likely behaving below the top layer, whether the plant is still actively moving, and whether anything in its recent conditions has changed.
The first thing I pay attention to is how the pot feels, not just how the surface looks. A dry-looking top layer can be misleading, especially in a chunkier mix where the upper part dries faster than the lower root zone. If the pot still feels heavy or cool and damp deeper down, I do not treat it like a truly dry plant just because the top looks lighter.
I also look at whether the plant still seems active. Are the leaves holding themselves well? Is the newest leaf still pushing? Is the growth point moving at all, or has everything gone still? A plant that is actively growing usually gives me more confidence about watering than one that has been stalled and low-energy for weeks.
Temperature changes matter too, so I always think about what the room has been like recently. If the weather has cooled down, the light has weakened, or the pot has been drying more slowly than usual, I assume the roots will be using water more slowly as well. I do not need the plant to “prove” that first with obvious damage.
If I am using a clear pot, I check whether the roots still look active. Healthy-looking roots and fresh root tips tell me much more than the surface of the mix ever can. If the roots look quiet, dull, or stalled, I become much more cautious about watering on autopilot.
I also ask whether the plant is going through something that changes water demand. A recent feed, a new leaf, flowering, fruiting, or recovery from a dry spell can all change how I interpret the same pot. The point is not to create a complicated ritual before every watering. It is simply to stop treating every Anthurium like it wants the same thing on the same day. Before I water now, I am not asking only, “Is it dry?” I am asking, “What kind of root-zone rhythm is this plant in right now, and is watering going to help that rhythm or disturb it?”
What This Changed About the Way I Water Anthuriums
If I had to reduce all of this to one honest conclusion, it would be this: for newer growers, the real danger is often not forgetting to water once. It is the anxiety that makes you overcorrect afterward. That is where I made some of my worst mistakes. A plant looks a little dry, I feel guilty, I water heavily, and the root zone ends up paying for that panic more than the leaves ever did.
I also believe less and less in fixed watering intervals. Anthuriums do not live by a calendar, and I do not think they can really be watered well that way for long. Too much changes from week to week — temperature, light, airflow, root activity, plant size, even the structure of the mix itself over time. The same pot can behave very differently in the same home depending on what season the roots are going through.
That is why I no longer look for one universal formula. I care much less now about whether I am giving “more” or “less” water, and much more about whether I am creating a root zone that stays wet for too long. For me, that is where most Anthurium watering problems actually begin.
And for anyone who wants a low-effort setup, I do not think the best method is automatically the easiest one. The most reliable setup is the one least likely to leave the roots stale, airless, and quietly stressed over time. That matters much more than whether the method looks convenient on paper.
I no longer ask, “How often should I water Anthuriums?”
I ask, “What kind of root-zone rhythm am I creating for this plant right now?”
FAQ
Still figuring out what works for your Anthurium?
Light, watering, humidity, soil, and root health all affect how an Anthurium grows at home. If you’re still comparing care routines or trying to build a setup that actually works indoors, my main Anthurium care page brings the most useful guides together in one place.
Go to Care Hub →