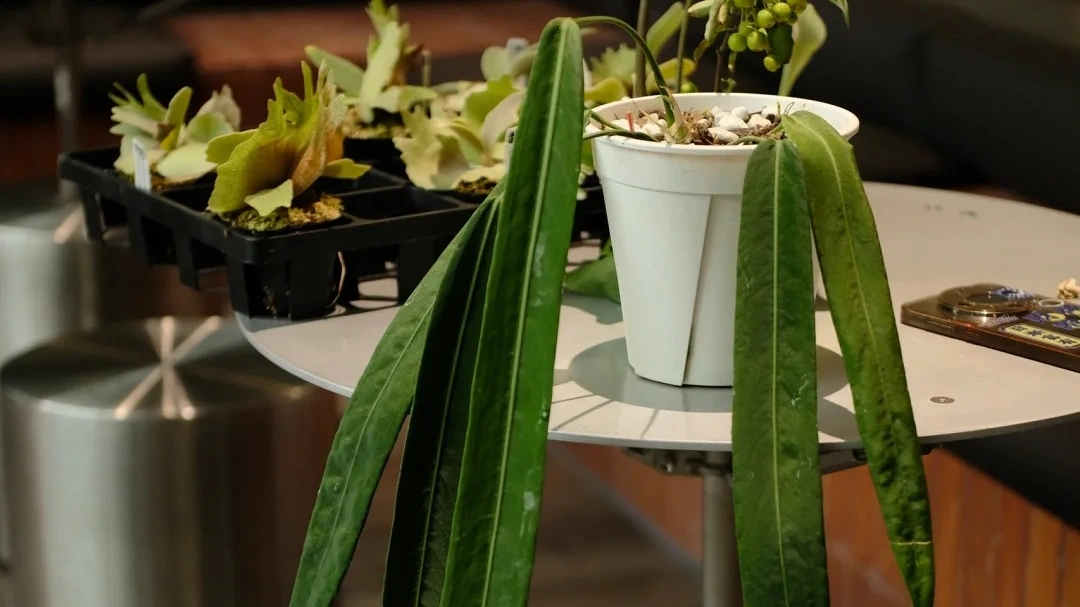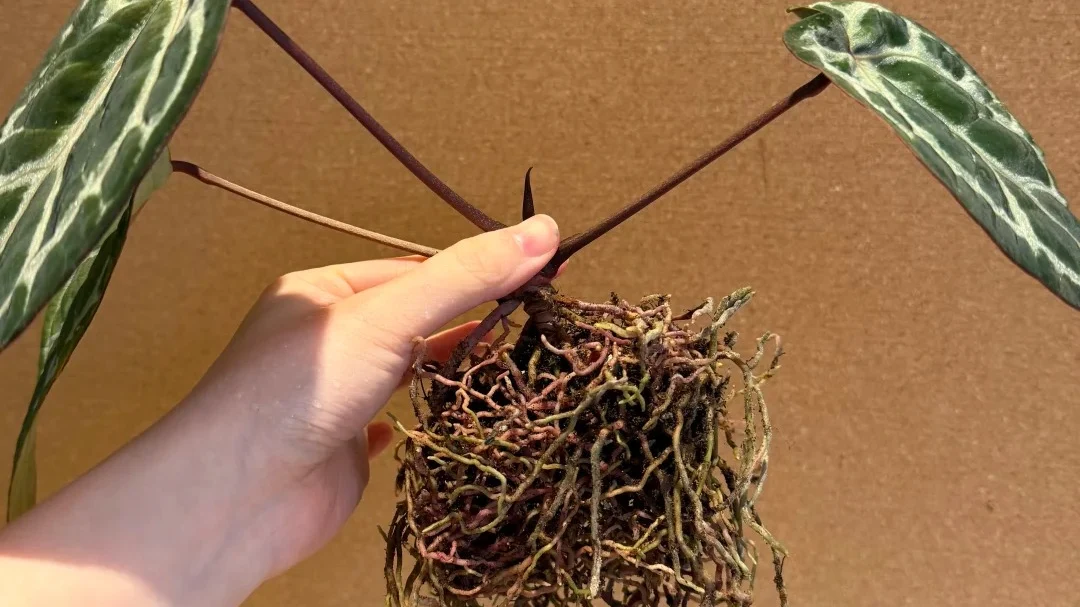
I had this Anthurium crystallinum for about a month before I finally repotted it. When I bought it, I could already tell the root system was well developed. The plant did not look weak, but the pot felt packed, and I had a feeling the roots were probably circling tightly inside.
I did not repot it on the first day. With anthuriums, especially velvet leaf types, I prefer to let the plant settle a little before disturbing the roots. A newly arrived plant may already be dealing with a change in light, humidity, temperature, and watering rhythm. Repotting too quickly can add one more layer of stress.
But after watching it for a while, I decided it was ready. The real question was not just whether I should repot it. The harder question was how much I should disturb the root ball.
When an anthurium is only lightly rootbound, I do not tear the roots apart. But when the roots are packed tightly and circling in the shape of the old pot, I do loosen them. A few broken roots are not ideal, but leaving a locked root ball untouched can be worse. The plant may sit in the new pot for a long time without sending roots into the fresh mix.
This is how I repot a tightly rootbound Anthurium crystallinum — why I loosen the root ball, how I set it into fresh mix, and what I do afterward to help it recover instead of stalling.
When I Decide an Anthurium Is Ready for Repotting
I do not repot every new anthurium immediately. If the plant is stressed, cold, recently shipped, or still adjusting to my home, I usually wait. A full pot does not always mean the plant needs to be disturbed right away.
I start thinking about repotting when I see a few signs together:
- The roots are circling tightly inside the pot.
- The pot dries too fast or dries unevenly.
- New growth slows even though light, watering, and temperature have not changed much.
- The plant looks stable enough to handle root disturbance.
- The old pot feels too tight, or the mix looks tired and compacted.
For this Anthurium crystallinum, I waited about a month before repotting. It was not collapsing, but the root system looked well developed, the pot felt crowded, and the plant seemed stable enough to handle the disturbance.
I would rather repot when the plant is steady and the room conditions are mild, not when it is already weak, cold, or stuck in slow growth. Repotting should help the plant move forward, not add stress when it is already struggling.
What I Prepare Before Repotting
I like to prepare everything before I take the plant out of its old pot. Once the roots are exposed, I do not want to start looking for mesh, mix, or ties with one hand while the root ball is drying out.
The Basic Setup I Used
For this repot, I used a clear nursery pot because I wanted to watch how the roots recovered afterward. With anthuriums, I find this helpful. Leaf growth can pause after repotting, but if I can see new root tips moving into the fresh mix, I know the plant is settling.
I also prepared an airy but moisture-retentive anthurium mix. I do not want the mix to stay soggy, but I also do not want it to dry so fast that the fresh roots struggle. For a rootbound plant, the new mix has to hold some moisture while still leaving enough air around the roots.
Because the drainage holes on the new pot were quite large, I used a small mesh screen at the bottom to stop the mix from falling out. I chose a pot only slightly larger than the old one. A much bigger pot may look generous, but it can hold too much moisture around disturbed roots.
For the aerial roots, I also prepared sphagnum moss and a plastic mesh collar. The idea is not to bury the stem too deeply, but to give the aerial roots a moist, airy place to grow into after repotting.
What I Use Carefully
I sometimes use a small amount of slow-release fertilizer, but I keep it light. A freshly repotted anthurium does not need to be pushed hard right away, especially if the roots were loosened or some roots broke during the process.
Pest-prevention or fungicide products are optional. If I use anything like that, I keep it light and only use products I already know are safe for my indoor plants.
I try not to combine too many treatments at once. Repotting already disturbs the plant. If I add heavy fertilizer, strong chemicals, a large pot, and a new growing setup all at the same time, it becomes harder to know what the plant is reacting to afterward.
The Rootbound Part: Why I Do Not Plant It As-Is
This is the part where I think many repots go wrong. A tightly rootbound anthurium can look healthy from above, but the root ball can behave like a hard plug once it is inside a new pot.

If I take that whole packed root mass and place it directly into fresh mix without loosening anything, the roots may keep circling inside the old shape. The new pot may look better, and the fresh mix may be good, but the plant is not really using it yet. The roots can stay locked in the center while the new mix sits around the outside.

That is one reason some anthuriums stall after repotting. The plant was technically moved into a larger pot, but the roots were never encouraged to leave the old root ball.
I do not tear every anthurium apart. If the roots are only slightly full, I usually loosen the outside gently and leave most of the root ball alone. But when the roots are tight, wrapped around each other, and packed into the shape of the old pot, I do break up the outer root mass a little.
A few broken roots are not the end of the world. For a severely rootbound plant, gently loosening the root ball can help encourage new roots to move into the fresh mix instead of staying trapped in the old pattern.
The goal is not to damage the plant for no reason. The goal is to give the roots a way out. I want the fresh mix to work between the roots, not just sit around a solid root plug.
How I Repot the Plant Step by Step
I try to keep the repotting process calm and practical. The goal is not to clean the plant perfectly or remove every bit of old mix. The goal is to help the roots move into the new pot without shocking the plant more than necessary.
Before I Take It Out of the Pot
I prefer to repot on a mild day, not during cold weather, extreme heat, or when the plant already looks stressed. I also avoid repotting when the mix is bone dry or soaking wet. Slightly moist is easier to handle because the root ball usually comes out more cleanly.
Before removing the plant, I gently squeeze the sides of the nursery pot to loosen the root ball. I also make sure the new pot is only slightly larger than the old one. With anthuriums, especially after root disturbance, a pot that is too large can hold more moisture than the roots are ready to use.
Checking and Loosening the Roots
Once the plant is out, I check the roots first. I remove any roots that are dry, hollow, mushy, or rotten. Healthy roots may not all look perfect, but they should feel firm, not slimy or collapsing.

For a tightly rootbound plant, I loosen the outside of the root ball with my fingers. I do not try to bare-root the whole plant unless the old mix is very bad or the roots need serious cleaning. I keep part of the central root ball intact, then open up the outer roots enough so they are no longer locked into the old pot shape.

Some outer roots may break during this step. I try not to be rough, but I do not panic over minor damage if the root ball is seriously packed. The point is to open the outer roots enough for new growth, not to tear the plant apart.
Filling the New Pot
I start with a layer of fresh mix at the bottom of the new pot, then place the plant at the right height. I do not want the base buried too deeply, but I also do not want the plant sitting too high and unstable.
Then I fill around the roots gradually. I spread the loosened roots a little so they are not squeezed back into one tight mass. As I add mix, I gently tap or shake the pot so the mix settles between the roots.
This part matters a lot. I want the fresh mix to work between the roots, not just sit around the outside of the old root ball. Large air pockets can leave roots dry, while tightly packed mix can reduce airflow. I aim for firm contact without crushing everything down.
Adding a Moss Collar for Aerial Roots
If the plant has aerial roots near the base, I like using a simple plastic mesh collar filled with sphagnum moss. I wrap the mesh around the base, secure it, and fill it with lightly moist moss.

I do not pack the moss too tightly. The goal is to create a moist, airy place for aerial roots to grow into, not a wet sleeve that stays soggy around the stem. I keep the moss moist, but not constantly soaked.
For a plant like Anthurium crystallinum, this can help the upper roots stay active after repotting, especially when the lower root ball has just been disturbed.
Watering It In
After repotting, I water it in thoroughly so the fresh mix settles around the roots. I let the water run through the pot and drain out fully.

I do not leave the pot sitting in water afterward. That first watering is to settle the mix and remove dry pockets, not to keep the plant wet for days.
After that, I wait for the mix to begin drying before watering again. This is where I watch the plant carefully. A freshly repotted anthurium may pause for a while, but I do not keep adding water just because it has not started growing yet. The roots need moisture, but they also need air.
Aftercare: How I Help It Settle In
After repotting, I care more about root recovery than leaf growth. If the roots start moving into the new mix, the leaves usually catch up later.
I keep the plant in bright indirect light, but I avoid harsh direct sun right after repotting. The plant has already been disturbed, so I do not want strong light, heat, and root stress happening at the same time.
I also try to keep the environment steady:
- gentle airflow
- stable warmth
- no sudden move to a much brighter or darker spot
- no heavy fertilizer right away
- no repeated watering just because the plant looks slow
This is where a clear pot helps. Instead of judging only by the leaves, I can watch for new root tips moving into the fresh mix. That tells me the plant is starting to settle.

A short pause after repotting is normal. I do not panic if the plant does not push a new leaf immediately. What I do watch closely is whether the pot is drying normally and whether the leaves stay reasonably firm.
The biggest mistake I try to avoid is watering too often during this stage. A newly repotted anthurium may look quiet for a while, but that does not mean it needs more water. If the mix is still moist, I wait. The roots need time, air, and stability more than constant attention.
Loosen the Roots, but Do Not Destroy the Plant
For a tightly rootbound Anthurium crystallinum, I do not think repotting is just about moving the plant into a bigger pot. The root ball has to be open enough for the plant to actually use the fresh mix.
At the same time, I do not want to rip the whole plant apart. My balance is simple: keep the healthy center stable, remove bad roots, loosen the outer root mass, and give the plant a calm recovery period afterward.
I would rather break a few outer roots and help the plant restart than leave a tight root ball sitting untouched in fresh mix for months.
FAQ
Still figuring out what works for your anthurium?
Light, watering, humidity, soil, and root health all shape how an anthurium grows indoors. If you’re still comparing care routines or trying to build a setup that actually works at home, my main anthurium care page brings the most useful guides together in one place.
Go to Care Hub →